• Home
  • Suggest A DIY
  • DIY Newsletter

Scrap Booking

Themes, layouts and inspirations

  • About CraftGossip
  • Our Network
    • Bath & Body Crafts
    • Candle Making Ideas
    • Crochet Ideas
    • Cross Stitch
    • Edible Crafts
    • Felting Patterns
    • Glass Art
    • Home & Garden Ideas
    • Indie Crafts
    • Jewelry Making
    • Kids Crafts
    • Knitting Patterns
    • Lesson Plans
    • Needlework
    • Party Ideas
    • Polymer Clay
    • Quilting Ideas
    • Recycled Crafts
    • Scrapbooking
    • Sewing Patterns
    • Card Making
    • DIY Weddings
    • Not Craft Ideas
  • Giveaways
  • Roundups
  • Store
  • Search

Tutorial: White Space Layout

October 9, 2009 by Francine Clouden

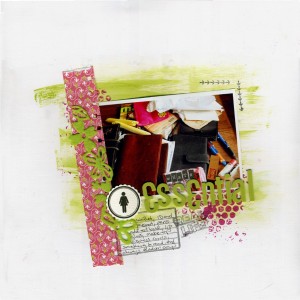
whats essential

White space is also known as negative space, and is that part of a layout that isn’t “filled up” with elements. It doesn’t need to be white, just empty, but I chose to use white card stock for my background. White space is an effective design element because it allows the eyes to rest, and also helps to emphasize the elements that are there, thus pulling the viewer in.
You will need:

1 photo
12×12 Card stock
Patterned paper
felt or other trim
acrylic paint in two colours
journaling stamp
Phrase stamp
decorative stamp
circle label
letter stickers (small and large)
decorative border punch or scissors
Bubble wrap

1. Paint a roughly square shape in the center of the card stock. This doesn’t have to be precise, simple swipe the brush several times across the card stock

2. Brush some of the second colour of paint across a piece of bubble wrap and press into the top left and bottom right corners of the painted square

3. Stick photo approximately in center of painted area

4. Cut a strip of patterned paper about 1.5″ wide by 7″ long and tear a bit off each end. Use the punch or scissors to make a border along one long side. Add to left, slightly on top of photo

5. Stamp journaling spot to bottom left of photo, slightly on top of the paper strip

6. Add felt trim and circle label as shown

7. Add title with letter stickers

8. Stamp phrase stamp below title, overlapping journaling spot

9. Use decorative stamp to make a photo corner above the top right edge of photo

10. Add journaling and voila!

Note: This tutorial was originally posted on my tutorial blog Tuesday To-Do
«
»

Trackbacks

  1. Totally Technique - March 2011 - Scrapbook-Bytes | Digital Scrapbooking Forum says:
    March 3, 2011 at 4:35 pm

    […] and cluster with me! Here's a an additional link to help on clustering: Katie the Scrapbook Lady Scrapbooking Bella Online There are many many many other tutorials out there on white space. Just google it! […]

Have you read?

How to Make a Cute Teddy Bear Mini Journal

How to Make a Cute Teddy Bear Mini Journal

How darling is this mini friendship journal from Diane!? It’s so cute, filled with stamped Teddy Bears and sweet sentiments in it’s own little floral box. She used dies and stamps from Art Impressions to create this sweet little project that would be perfect to send to a friend to brighten their day, you could even include photos and personalized journaling to make it more of a mini scrapbook if you’d like. The box the journal is in was die cut from blue cardstock with an open window on the top and covered in custom “pattern paper” that she stamped and colored with a magnet snap to keep it closed.

How to Make a Cute Teddy Bear Mini Journal

She used plaid, striped and polka dot pattern paper to decorate each page, using more blue cardstock for the base of the album. Each page has has either a stamped sentiment or a different sweet bear stamped in sepia ink and water colored with markers on a white die cut panel with pretty detailed edges.

Visit the Art Impressions blog for directions and more details.

-Heather

You can shop for all these products at Art Impressions


Explore

backgrounds Christmas Crafts Design Theory die cutting embellishments family Freebies Free Printables Holidays Inspiration - Layout Ideas Journaling News Paper Crafts Scrapbooking Themes Scrapbook Titles Techniques Tips and Tricks Tutorials Tutorials & Ideas

RSS More Articles

  • Free Felted Woodland Mini Mending Pattern Review
  • Free Felting Tutorial Friday: Needle Felted Dragonfly
  • Knit a Hood for Your Fall Wanderings
  • Book Review: Borders
  • How to Make a Cute Teddy Bear Mini Journal
  • United We Stitch Invites Quilters and Textile Artists to Imagine the Future of Democracy
  • Free Plaid Crochet Throw Pattern Review
  • How to Make a DIY Detox Hair and Scalp Mask for Product Buildup
  • AITA for Charging Extra for Rush Orders (Even Though I Work From Home)
  • Cross Stitch a Job and Get a Jump on Holiday Crafting

Copyright © 2026 · CraftGossip | Start Here | Contact Us | Link to Us | Your Editors | Privacy and affiliate policy