The folks at Epson sent me the Epson Artisan 1430 printer to review and share my opinions with you all. I have been using it for the last several weeks, testing out all the features, and have decided to break the review down into a series, since there is so much to cover! This first post will briefly introduce you to the printer, and I will talk about setting it up, and using it for the first time.
But first here is what Epson has to say about the printer.
The Artisan 1430 takes photo printing to the next level of performance, delivering brilliant, Ultra Hi-Definition prints as large as 13″ x 19″. And, with convenient wireless networking, it’s easy to share your Artisan 1430 with others. Now, anyone on your network can create large-size, gallery-worthy prints, or even design and print professional looking CDs / DVDs. The Artisan 1430 includes advanced color and lighting correction for amazing photos, as well as Adobe® Photoshop® Elements (a $79 value1) for added creativity. Photos are smudge, scratch, water and fade resistant thanks to Claria® Hi-Definition Ink1. And, prints last up to four times longer than photo lab prints1. Take your creativity further with the Artisan 1430 — from Epson, the brand of choice among professional photographers.
Sounds pretty good right? I was especially interested in being able to print larger sized photos, as well the wireless function, since as my office is upstairs, running cables would be pretty inconvenient!
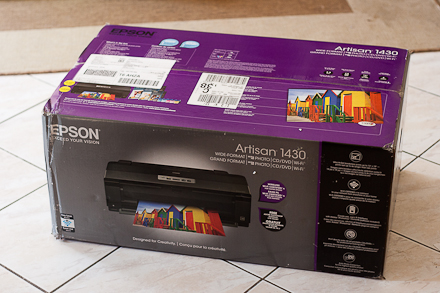
My first impression of the printer is that it was big!
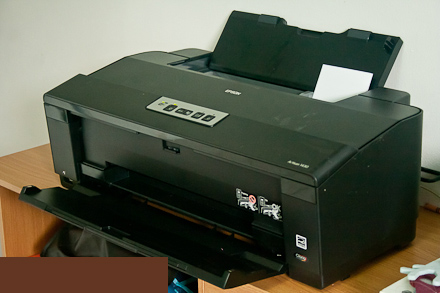
 For reference those floor tiles are 12″x12″ – the size of a scrapbook page, and the printer filled the box completely. It measures 24″x14″x8″ once installed.
 This is without the paper trays fully extended.
Setting Up the Printer
The first step in the process is to get the printer plugged in and install the cartridges. Pretty standard fare. Next, the software which comes on the included CD needs to be installed on each computer you plan to print from. This was also simple as it is basically plug and play, and follow the installation steps. Because one of the PCs I planned to use is my Netbook which doesn’t have a CD drive, I had to go to the Epson site to download the software. The Start Here installation guide tells you the URL you need to go to for this.
The beauty of the wireless connection comes in if you have a network that uses Wi-Fi CERTIFIED n Technology. In this case you simply have to press the Wifi button on your wireless router, and then the wifi button on the printer within 2 minutes.
 Sadly, I do not have this technology. But all was not lost! In this case you will need to use a standard USB connection to complete the process. NOTE: the printer does not come with a USB cord, so make sure that you have one handy. Once I figured this out the rest of the installation went smoothly. After the printer was installed on my netbook and recognised by the network, it was a simple matter of installing the software on my desktop, then going into my network settings to set the printer as my default.
Then it was time for a test run! Of course the first thing I tried was printing photos. I am after all a scrapbooker. Epson also sent me some 4×6 Epson Premium Glossy Photo Paper. At this point I discovered a feature I knew I would love. I didn’t have to mess with different paper trays! Whatever the size or type of paper, it all goes in the same tray at the back, and is secured with a sliding clip. Plus the paper goes in print side up, all the time. This is unlike my previous printers where I had to change the tray used, depending on if it was plain or photo paper, not to mention remembering which way up the paper needed to be placed.
The steps in the print dialog were self explanatory
You can choose the print quality, the paper size, type and orientation. I printed three 4×6 photos which printed up in a couple minutes. Those white borders on the vertical ones came about because I decided to not adjust the size of my photo to fit on the paper, and my digital photos are not true 4×6.
 I was very happy with the quality and the rich colours of the photos!
To sum up my first impressions:
- This is a big printer, probably not suited if you have a small space for scrapbooking. However if you have a wireless network you can set it up in a central location in your home or business.
- The initial set up process is relatively painless, and should take you less then 30 minutes.
- I love that I don’t have to deal with multiple paper trays!
- The quality of the photos is excellent.
Next week we will go deeper and investigate printing larger sizes, including 12×12 scrapbook pages!


Sounds like the perfect printer, and one that I’d really like to get, as I’m in desperate need of one (ours kicked the bucket about 3 months ago).
Would you know what the retail price for it is?
Have a lovely weekend, and thanks for the review of it. Definitely something I want to check out – hopefully it’ll be available in Ireland before too long.
Hi June, I think it retails in the US for around $300. I really do like it, and I am realising more and more that the colours are more vibrant than my previous printer. I plan to do a comparison in my next post.
This looks like an awesome printer but I’m curious to see your comparison to your previous printer. Can the qualities of the Epson really justify the price tag?
My comparison will definitely be in the next post I do. And for now my answer to that is yes 🙂