• Home
  • Suggest A DIY
  • DIY Newsletter

Scrap Booking

Themes, layouts and inspirations

  • About CraftGossip
  • Our Network
    • Bath & Body Crafts
    • Candle Making Ideas
    • Crochet Ideas
    • Cross Stitch
    • Edible Crafts
    • Felting Patterns
    • Glass Art
    • Home & Garden Ideas
    • Indie Crafts
    • Jewelry Making
    • Kids Crafts
    • Knitting Patterns
    • Lesson Plans
    • Needlework
    • Party Ideas
    • Polymer Clay
    • Quilting Ideas
    • Recycled Crafts
    • Scrapbooking
    • Sewing Patterns
    • Card Making
    • DIY Weddings
    • Not Craft Ideas
  • Giveaways
  • Roundups
  • Store
  • Search

Printing Scrapbooking Supplies

February 5, 2007 by Heather Holbrook

I am very excited about my very first opportunity to share with you. I am actually quite nervous, but I am going to push that aside and go for.
Have you ever experienced those times when you were scrapbooking along and the right piece of paper could not be found in your own personal stash?

Well, if you haven’t, I have.

Usually when I make time to scrapbook, I will buy all of my supplies at one time. But there are times when I get going, my themes and colors get changed, and I am doing more freestyle then I thought I would.

I have come across a way to save myself another trip to the craft store. I would not say this would be your best option for mass production, but for a little here and there, it will work fabulously.

It is PRINTING YOUR OWN SCRAPBOOKING SUPPLIES. I have found several sites on the Internet that allow you to download patterned paper. And the best part is, most of it is FREE!
To make sure I was giving you good stuff, I printed off a couple of sheets from different sites. What I have found was, it is a great option if you are not looking for a lot and you do not want to go back to the craft store and search something out.

Of course, you are going to get the best quality if you have a decent printer. You also should be using quality paper.

If you are planning on layering many pages, regular printer paper will do you fine. If you are planning for this piece to go solo, I think using card stock is the better option. I also think if you are wanting the glossy look, you could use photo paper. If you are wanting to add more color, then you could use solid colored paper and give it just a little more.

What I love about it is, you can make it your way and the fact that you get it for free.

I have included some links. I hope you check them out and enjoy scrapbooking your way.

Scrapbookscrapbook.com
hp invent
Canon Scrapbooking
«
»

Comments

  1. Brenda says

    February 8, 2007 at 10:19 am

    great idea and time saver! thanks Jessica

Have you read?

10 Colorful Halloween Scrapbook Layout Ideas

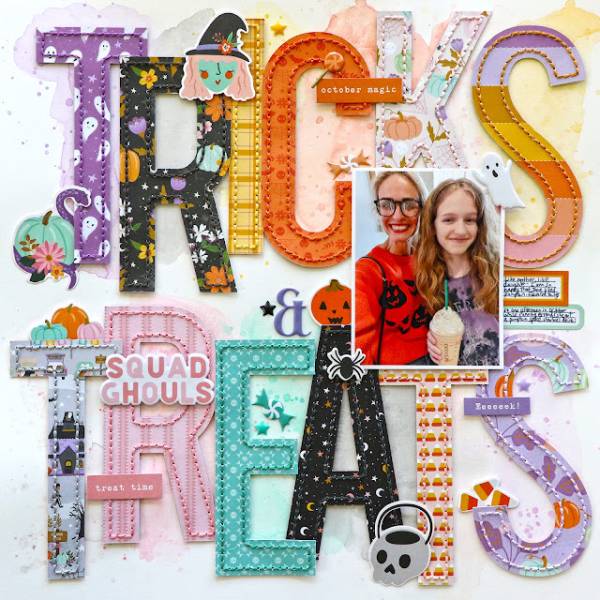
Paige filled her page with one of her own die cut title designs that says “Tricks and Treats”. The letters are cut from all different types of Fall and Halloween pattern papers and stitched around the edge of each one in coordinating thread colors. Her photo and some puffy stickers over lay some letters, there’s a couple of small tags for journaling and a light watercolor wash for the background too. Learn more at the Paige Evans blog.

Halloween is almost here and I hope you’re ready with your house decorated to greet all the trick or treaters, a trip to the pumpkin patch to pick and carve into the perfect Jack o’ Lantern, bought all the candy for trunk or treat and tried on all the costumes to find one that’s just right. I know you snapped lots of pic while getting ready for Halloween and will do on the big day too so let’s create some fun and colorful scrapbook layouts to remember all those spooky and silly Halloween traditions, here’s some amazing inspiration to get you started.

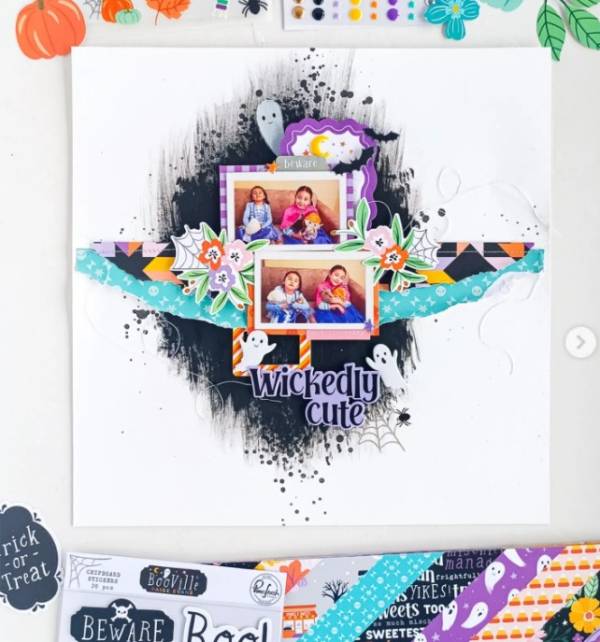
Nathalie created a dark black spooky splotch with ink streaks and splatter to offset all the color on her sweet Halloween layout. There’s a border of stitched and torn pattern paper across the center with matted photos, spider webs, florals, ghosts and webs with a cute sentiment below the border. I spotted her idea on her Tachita 55 Instagram page.

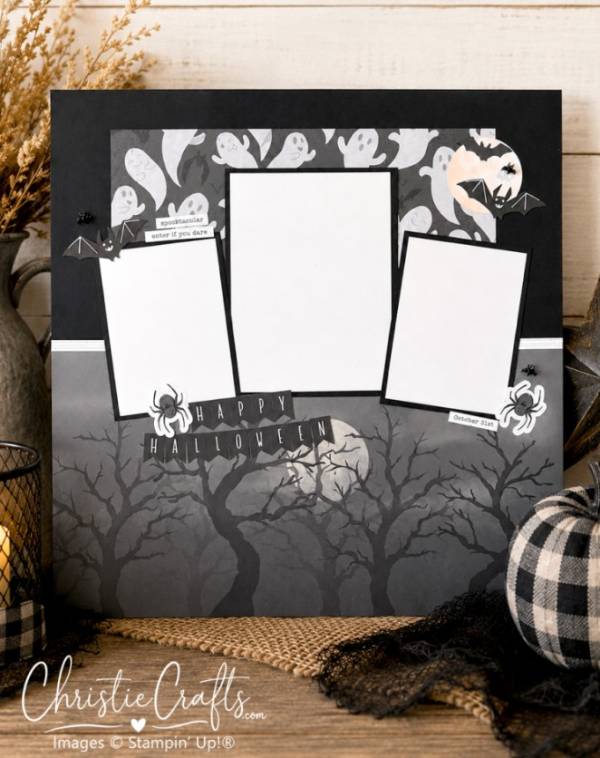
Christie created a simple but effective background with two Halloween pattern papers, one has spooky trees across the bottom and the other has happy ghosts matted on black with a white ribbon between the two. She also designed a fun banner with pennant letters and added a few bats and spiders. I know this isn’t a colorful layout but black and white pages like this are perfect for photos with loads of color to make them pop! Find all the details at the Christie Crafts blog.

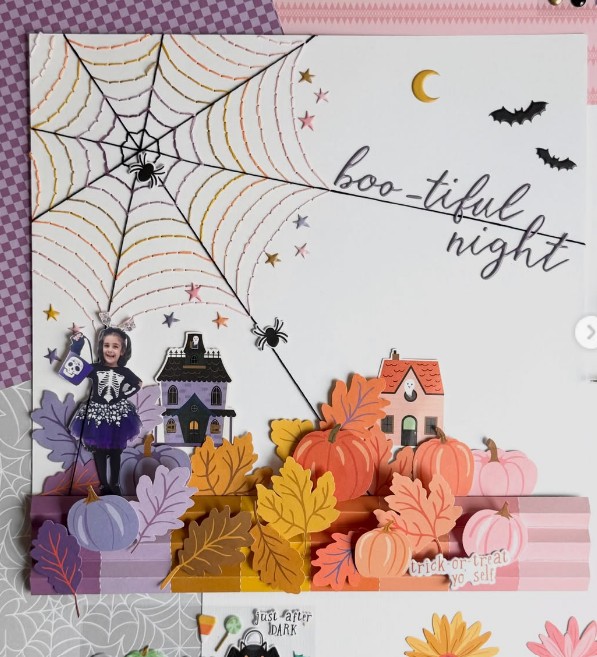
Camino’s darling design uses a fussy cut photo, which is a fun way to incorporate a picture into a scene, with haunted houses, a colorful striped border and piles of pumpkins and leaves in coordinating colors to the border. But the star of the show is the stitched spider web in the same matching colors with tiny spiders crawling on it. I came across her idea on her Camino Garcia Instagram.

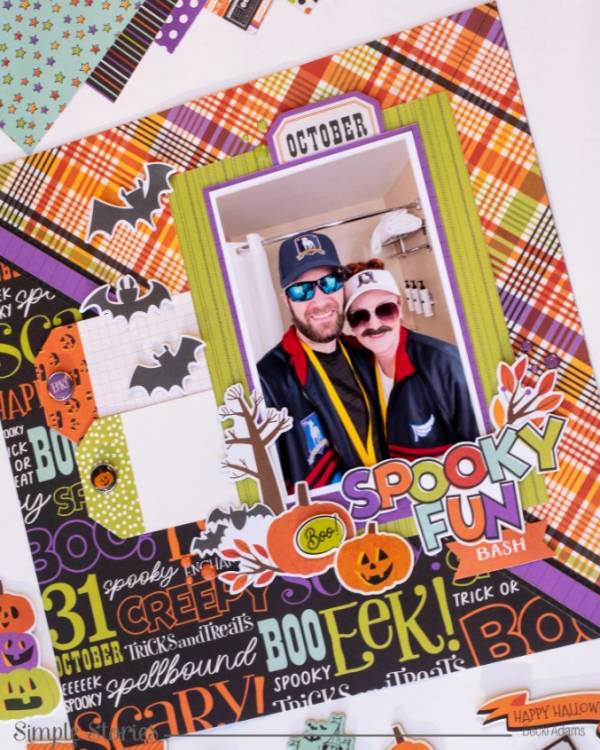
Becki created a dynamic background with colorful Halloween pattern paper cut at an diagonal for the background, adding a few thin strips to separate them. Behind her photos are two tags with enamel buttons, perfect for journaling, a flutter of bats and cluster of accents around the chipboard title. Find out more at the Simple Stories blog.

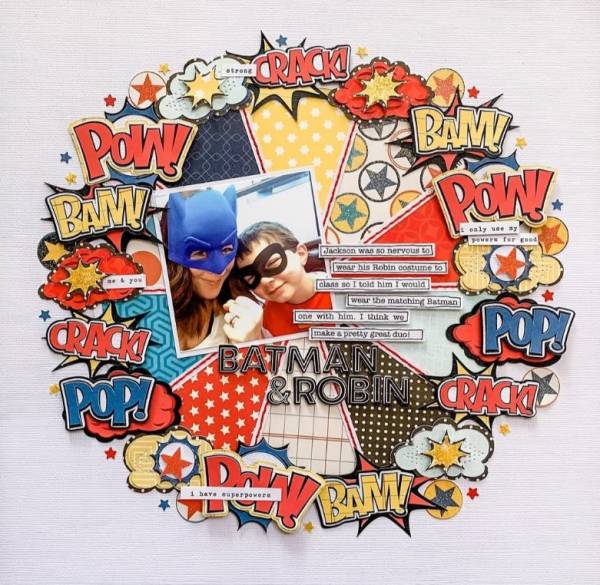
Allison’s stunning super hero layout has a pie chart center made of stitched pattern paper triangles and an amazing circle of die cut and fussy cut clouds and action words. The center photo is slightly tilted with journaling strips beside it and a fun custom black title. I spotted this idea on the Scrapbook Generation Instagram page.

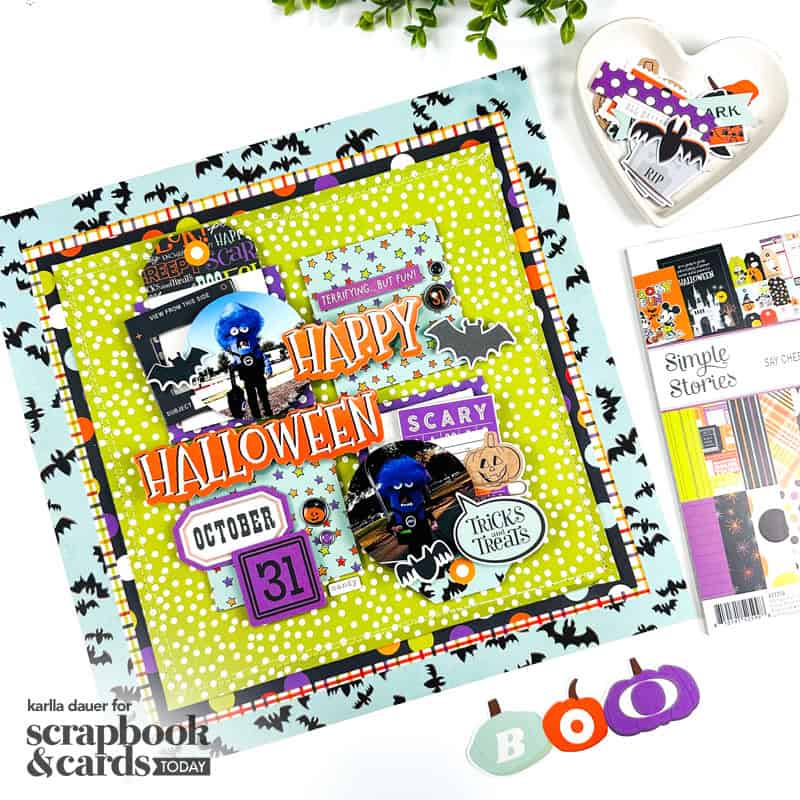
Karlla used a whopping 4 different layers of pattern paper for the background of her colorful layout, the top one also has stitching. The main design is a grid with 4 squares, two with tags and the photos layered over, the others have Halloween pattern paper with buttons, labels and sentiments with a title overlapping the grid. Find a link to her process video at the Scrapbook and Cards Today blog.

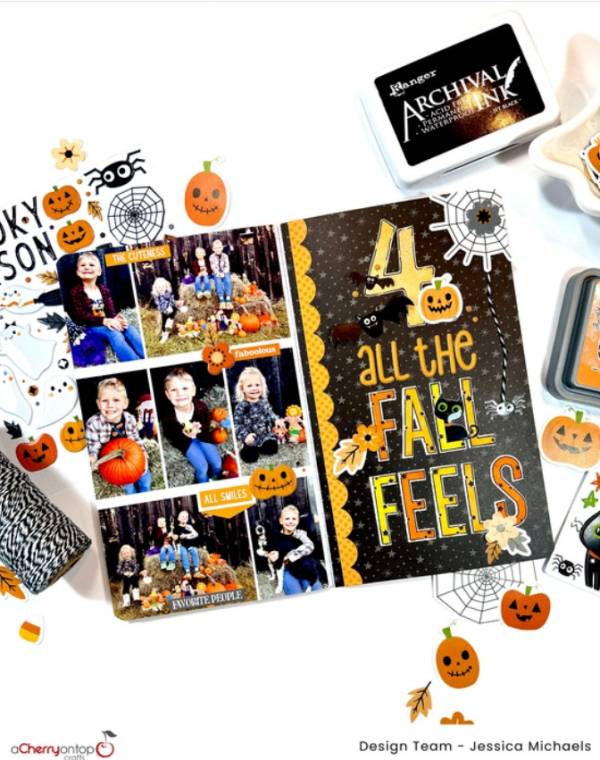
Jessica adjusted a sketch as the jumping off point for a double page spread in her Traveler’s Notebook. One side is filled with pumpkin patch photos with small stickers and sentiments, the other side is a custom mixed title made with puffy, die cut and stamped letters with cute critters tucked in and a scalloped edge. Find all the details at A Cherry on Top blog.

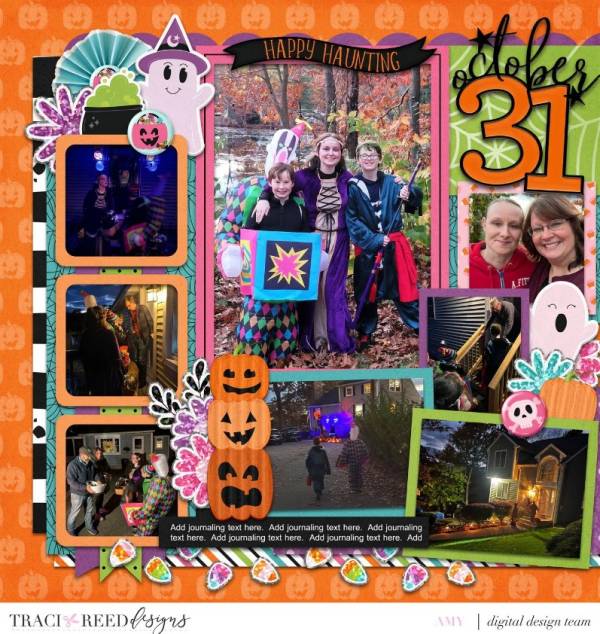
Amy’s fun digital design uses lots of frames and matts in bold colors around all the photos, of which there are 8! But there’s still room for a patterned background, brightly colored embellishments and some sentiments too. This is a great way to bring color to darker photos! She breaks it all down at the Traci Reed Designs blog.

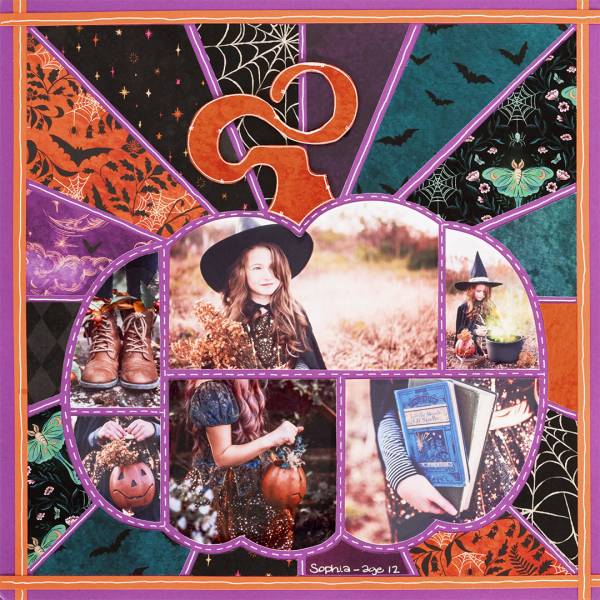
Melissa used a couple of templates for her Halloween page with a star burst design background filled with different pattern papers and a pumpkin template with open sections that she filled with photos. The templates were cut out from purple cardstock with faux stitching added and there’s also thin orange borders at the edges as well. Find directions at the Creative Memories blog.

I hope you have a fun and colorful Halloween!

-Heather

Looking for scrapbook supplies, we recommend A Cherry on Top.com


Explore

backgrounds Christmas Crafts Design Theory die cutting embellishments family Freebies Free Printables Holidays Inspiration - Layout Ideas Journaling News Paper Crafts Scrapbooking Themes Scrapbook Titles Techniques Tips and Tricks Tutorials Tutorials & Ideas

RSS feed: More Articles More Articles

  • Book Review: The Festival of Lights
  • My Favorite Things Knitwear Review: Is This Pattern Website Worth Browsing?
  • DIY Thrifted Wool Blanket Christmas Trees
  • DIY Christmas Cherry Body Scrub
  • 3 FREE Dark Academia Coloring Pages
  • Designer Spotlight: Stitching Housewives
  • Easy Projects to Knit with a Square (or Two)
  • 10 Colorful Halloween Scrapbook Layout Ideas
  • Ghost Poop Marshmallow Bags With a Free Printable Halloween Topper
  • Knit Picks Friends & Family Sale: Save 20% on Your Next Knitting Project

Copyright © 2026 · CraftGossip | Start Here | Contact Us | Link to Us | Your Editors | Privacy and affiliate policy