If you’re a fan of origami and love finding practical ways to incorporate it into your daily life, this tutorial is perfect for you! Over on the Pane, Amore et Creativa blog, there’s a fantastic step-by-step guide on how to use origami to make a cute and functional page corner bookmark. This little project is a great way to add a personal touch to your reading material, and it’s surprisingly simple to make with just a few folds of paper!
While the instructions are in Italian, don’t let that stop you—there are plenty of detailed step-by-step photos to guide you along the way, making it easy to follow even if you don’t speak the language. The visual cues in the tutorial will ensure that you can create this clever little bookmark in no time at all.
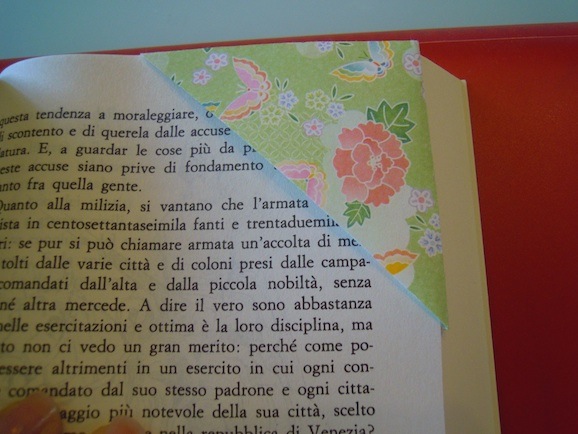
The beauty of this project lies in its simplicity. With just a square of paper, you can fold it into a corner bookmark that fits perfectly over the corner of your book page. Not only does this make it easy to find your spot in your book, but the origami design adds a unique and decorative flair. You can even customize your bookmark with fun patterned paper to match your personal style or the theme of your current reading.
Origami bookmarks like these are also a fantastic gift idea. Imagine gifting a beautifully folded corner bookmark to a book lover, paired with a favorite book! It’s a thoughtful, handmade touch that can make any reading experience feel a little more special.
This project is great for all skill levels, whether you’re a seasoned origami expert or just starting out. And since the materials needed are minimal—just a square piece of paper—you can easily whip up a batch of these bookmarks to give as gifts, or make a few for yourself to brighten up your reading time.
If you’re ready to give it a try, head over to Pane, Amore et Creativa to check out the full tutorial. It’s a fun and easy way to add some origami magic to your bookshelves! Happy folding! The instructions are in Italian, but it should be easy to follow along with the detailed step by step photos. Click here to go to the tutorial


What size paper do you think she starts with? 6×6? This looks like a fun idea!