• Home
  • Suggest A DIY
  • DIY Newsletter

Scrap Booking

Themes, layouts and inspirations

  • About CraftGossip
  • Our Network
    • Bath & Body Crafts
    • Candle Making Ideas
    • Crochet Ideas
    • Cross Stitch
    • Edible Crafts
    • Felting Patterns
    • Glass Art
    • Home & Garden Ideas
    • Indie Crafts
    • Jewelry Making
    • Kids Crafts
    • Knitting Patterns
    • Lesson Plans
    • Needlework
    • Party Ideas
    • Polymer Clay
    • Quilting Ideas
    • Recycled Crafts
    • Scrapbooking
    • Sewing Patterns
    • Card Making
    • DIY Weddings
    • Not Craft Ideas
  • Giveaways
  • Roundups
  • Store
  • Search

10 Ways to Use Pegboard in Your Craft Room

February 5, 2015 by Francine Clouden

Pegboard Organization in Craft Rooms and Studios

Pegboard isn’t just for workbenches and garages! Here are 10 ways you can use the versatile material for organizing your craft supplies. It’s particularly good for those with small spaces. Once you have the basic pegboard, you can add shelves, pots, baskets and more by using a variety of hooks. You can even find pegboard organizer kits at DIY stores.

What a great way to organize and personalize your workspace.  Looking for storage containers for your paper supplies? Check these out.

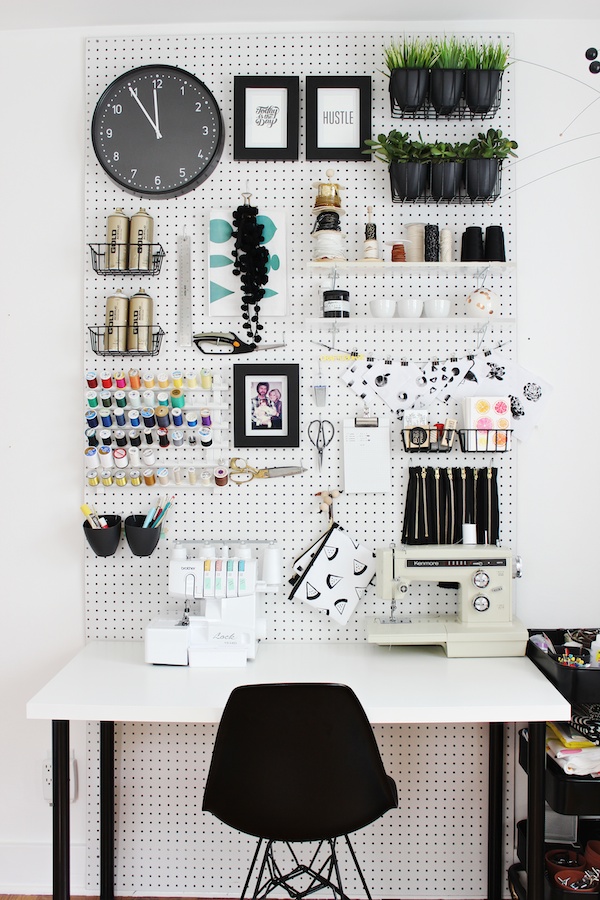
1. I adore this graphic version from Fabric Paper Glue above. Think beyond just supplies and add decorative touches like plants and posters.
craft-room-makeover-whites-and-brights-create

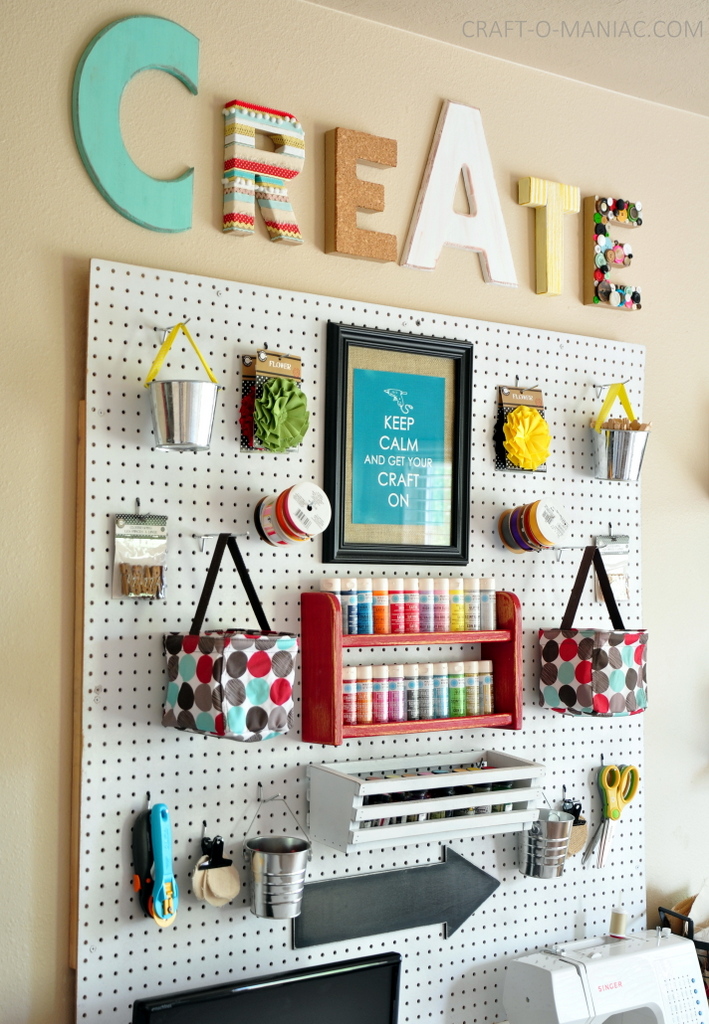
2. Jen at Craft-O-Maniac basically has a wall for her craft space, and she made the most of it with this huge pegboard that she spray painted white.
office-0481

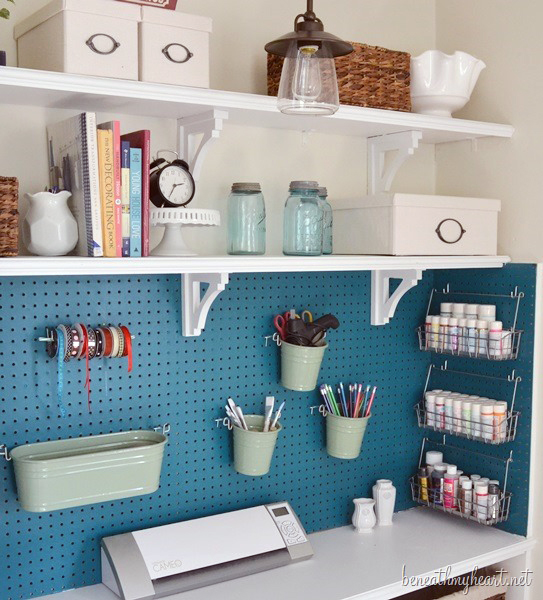
3. Speaking of small spaces, if all you have is a craft nook, pegboard can help! Traci at Beneath my heart converted a closet into her craft space and used pegboard painted blue for organizing lots of bits and pieces.
uzah4535fb2dc79d37

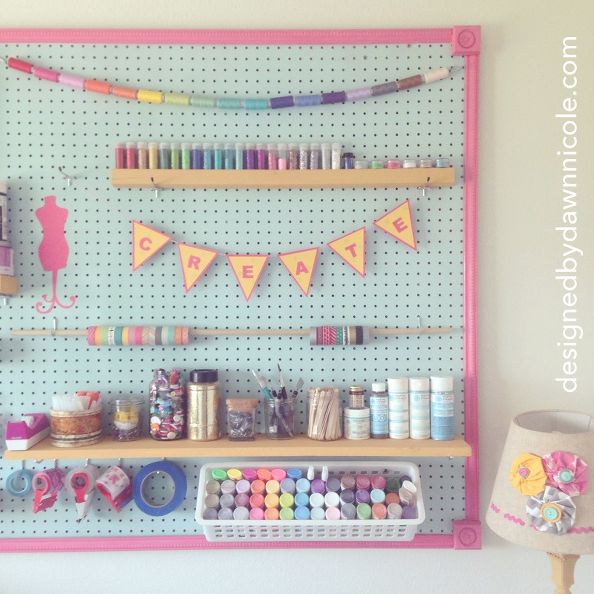
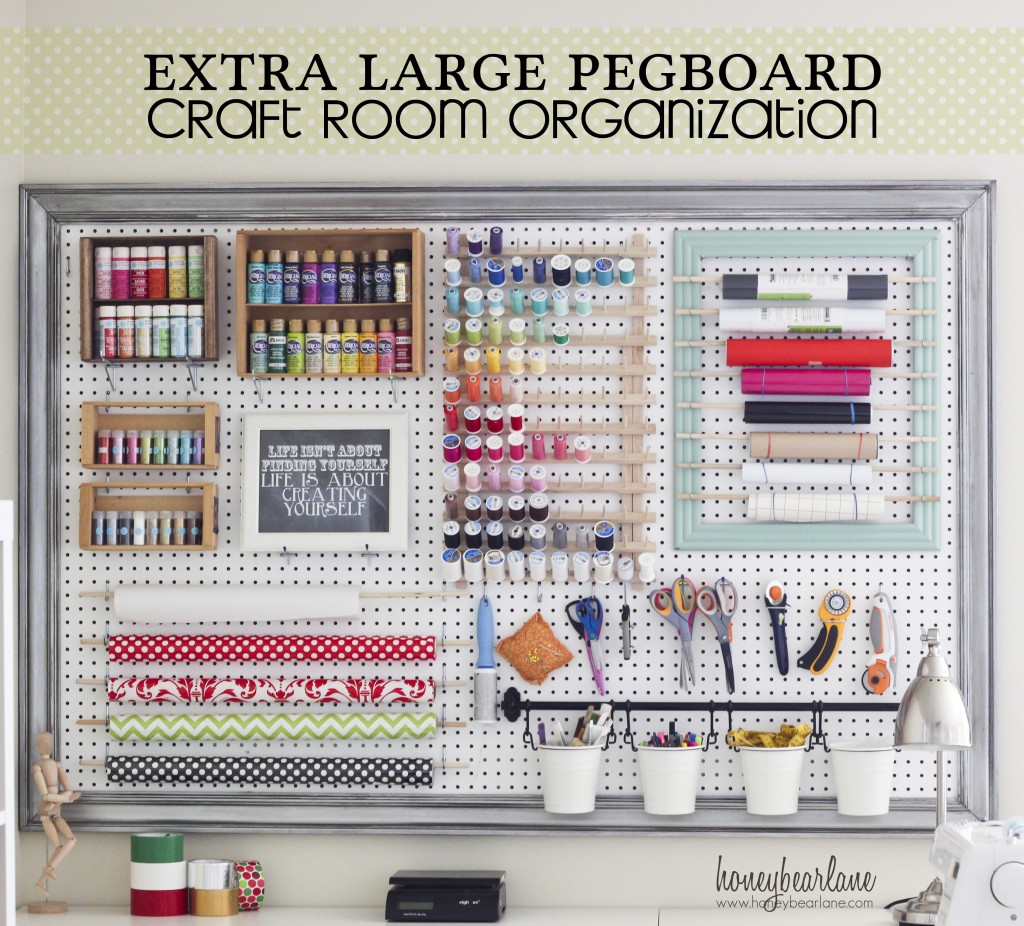
4. Why not frame your pegboard and turn it into a work of art like Dawn did? Her supplies are arranged so artfully!
extra-large-pegboard-craft-room-organization-1024x926

5. Another framed option from honeybearlane. I am loving the way she organized her wrapping paper (bottom left), and vinyl rolls (top right).
ultra-organized_5.jpg.rendition.largest

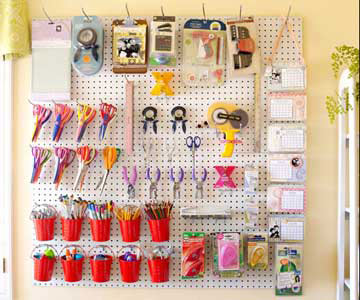
6. Keep all your tools corralled like Leah did here. You’ll never wonder where your scissors are again!
IMG_9185

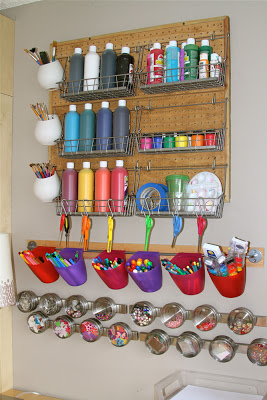
7. Don’t forget the kids! Keep their painting supplies accessible but protected with this idea from Holly.
pegboardandchubbyshelfthisblessednest

8. Even if all you have is a 2×4 space on the wall, you can get quite a bit organized on a pegboard! See how Kellie did it at Nest of Posies.
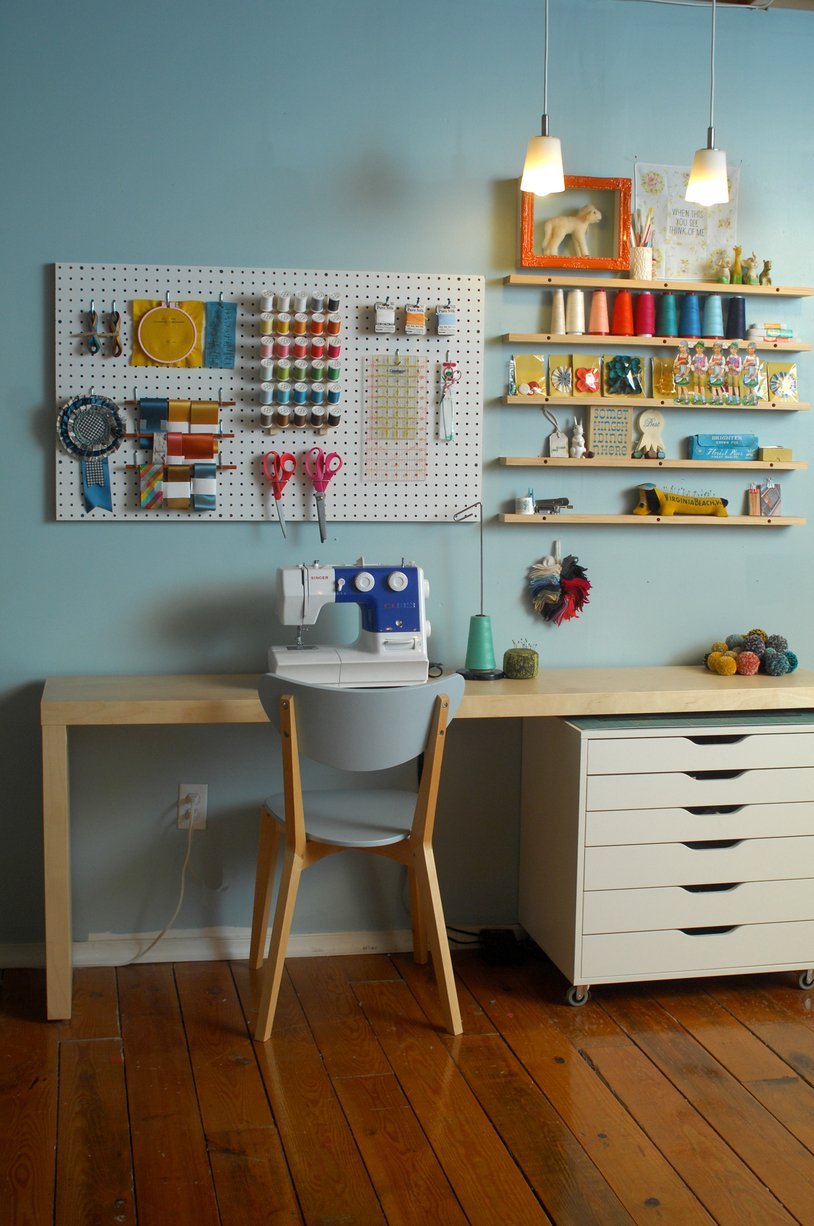
51af7e8174c5b60f770002e9._w.1280_h.1280_s.fit_

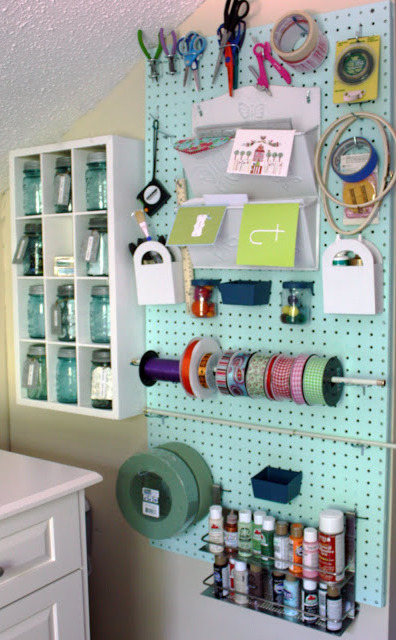
9. I love the neat way Shauna organized her small ribbon rolls on this pegboard.
Esther-workspace1

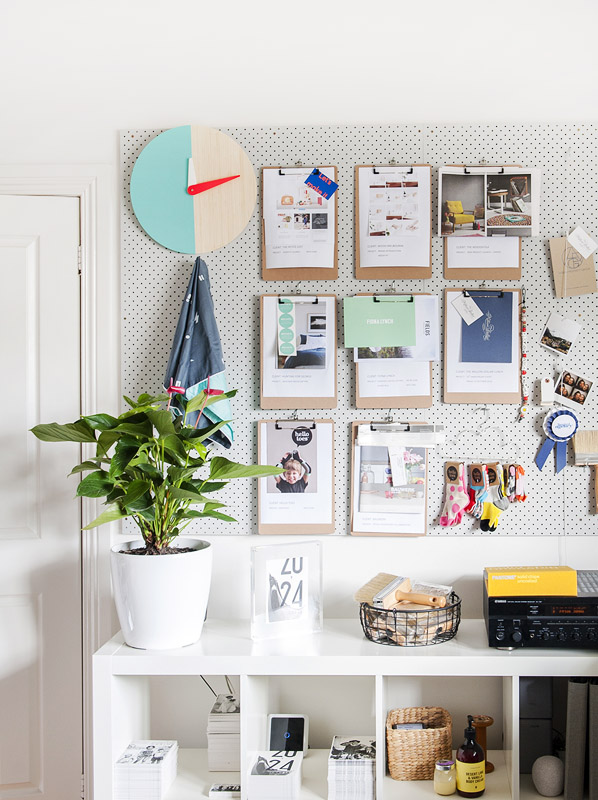
10. Use pegboard with rows of clipboards to create an inspiration or mood board for all your different projects. What a great idea to add a clock too! Via The Design Files.

I hope you got some great ideas and inspiration from these 10 sources. I know I did. Happy Organizing!


Need help with organizing your supplies? Check out these organizational products from Scrapbook.com

Looking for more ideas on Organizing your home? Check out our Facebook Group Organize My House & Get My Sh*t Together and read some of the most popular Organization articles we have written below.

5 Tips for Organizing your Craft Room with Style

Cricut Tutorial: Fabric organizing baskets for your craft room

Tips for Craft Room Organization – Scrap Booking

Declutter and reorganize your sewing space – Sewing

Organize your sewing room – free printable checklist
10 Best Craft Room Organization Ideas Worth Stealing

20 Office & Craft Room Organization Tips – Scrap Booking

«
»

Have you read?

How to Use a Gel Press for Mixed Media Scrapbook Backgrounds

How to Use a Gel Press for Mixed Media Scrapbook Backgrounds

If you’re not familiar a Gel Press is a large clear flexible printing plate, it reminds me of a clear stamp without a design, that you can use to create all different types of fun backgrounds for your paper crafts using different mixed media products and techniques. You can apply ink sprays, liquid inks or watercolor, stamping inks and so much more to create unique patterns, shapes and textures. Simply apply the ink with a brayer, spritzer or dropper, add water for a looser look or to mix colors and press it on your paper, apply even pressure and lift off the reveal your design. Jess used it to make an amazing colorful circle background for her layout adding some stamping, splatter, die cut stems, flowers and sequins to her print for a stunning artsy look. 

Visit A Cherry on Top blog to watch her process video and learn some fun basics for gel printing.

-Heather

Shop these products at A Cherry on Top.com

Explore

backgrounds Christmas Crafts Design Theory die cutting embellishments family Freebies Free Printables Holidays Inspiration - Layout Ideas Journaling News Paper Crafts Scrapbooking Themes Scrapbook Titles Techniques Tips and Tricks Tutorials Tutorials & Ideas

RSS More Articles

  • How to Use a Gel Press for Mixed Media Scrapbook Backgrounds
  • Clay Studio Series – You Tube Video Review – Centering Clay on the Wheel
  • 12 Free Chunky Knit Blanket Patterns for the Cosy Season
  • 9 Best Crochet Hooks For Beginners, Comfortable Crocheting And Every Type Of Yarn
  • 6 DIY Scalp Scrubs For Buildup, Oily Roots And Dry Flaky Scalps
  • It’s Okay If You Can’t Finish Your Quilt Right Now – A Gentle Reminder for Hobby Quilters With Unfinished Projects
  • 15 Junk Journal Spread Ideas You’ll Actually Want to Try
  • Sewing Pattern Saturday: Polly Tea Dress Sewing Pattern Review
  • Easy Outdoor Games to Play with Kids
  • How to Knit Feather and Fan Stitch: Tutorial, Videos and Beautiful Knitting Patterns

Copyright © 2026 · CraftGossip | Start Here | Contact Us | Link to Us | Your Editors | Privacy and affiliate policy