• Home
  • Suggest A DIY
  • DIY Newsletter

Scrap Booking

Themes, layouts and inspirations

  • About CraftGossip
  • Our Network
    • Bath & Body Crafts
    • Candle Making Ideas
    • Crochet Ideas
    • Cross Stitch
    • Edible Crafts
    • Felting Patterns
    • Glass Art
    • Home & Garden Ideas
    • Indie Crafts
    • Jewelry Making
    • Kids Crafts
    • Knitting Patterns
    • Lesson Plans
    • Needlework
    • Party Ideas
    • Polymer Clay
    • Quilting Ideas
    • Recycled Crafts
    • Scrapbooking
    • Sewing Patterns
    • Card Making
    • DIY Weddings
    • Not Craft Ideas
  • Giveaways
  • Roundups
  • Store
  • Search

10 Ideas for Delightful Handmade Christmas Cards

November 20, 2015 by Francine Clouden

10 Ideas for Delightful Handmade Christmas Cards


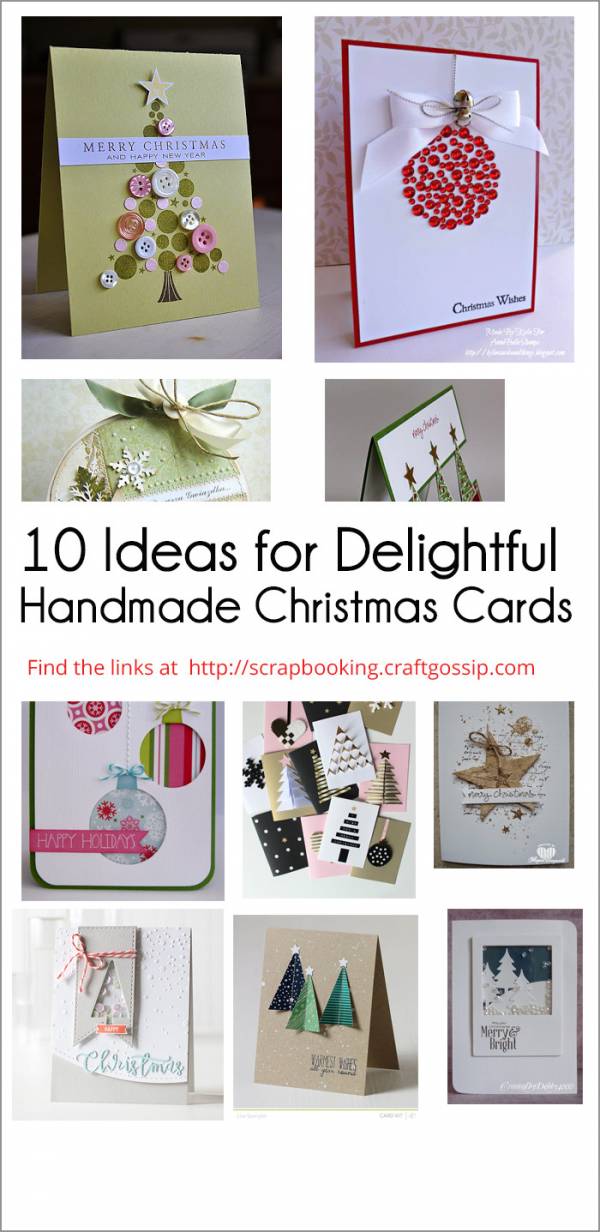
Get your Christmas scrapbooking supplies out and use them to make your own custom Christmas cards. Most of these designs can be made with scraps and small embellishments. card making is a great stash buster! With a variety of techniques including stamping and stitching, you’re sure to find a design or two to inspire a mega card making session this weekend

Are you looking for more Christmas Holiday papers and supplies? Check out some of our favorite holiday designs over at A Cherry on Top.  and these printable designs we found on Etsy.

Check out these other Christmas-themed posts for project ideas and tutorials for Holiday Scrapbooking.

The Christmas season is a special time of year. And what better way to show your loved ones you care than with a homemade Christmas card? It’s a unique way to express your emotions and add a personal touch to the holiday. You don’t have to be an artist to make a beautiful card — there are plenty of tutorials online that can guide you through the process. You can choose from hundreds of different designs and themes, or you can create your own from scratch. You can also use a variety of materials to make your card, from traditional paper and ink to more modern materials like felt and fabric. Whatever you choose, the sentiment behind the card will be sure to melt your loved one’s hearts. So this Christmas, don’t settle for a store-bought card. Take the time to make your own and add a special touch of love to the holiday.
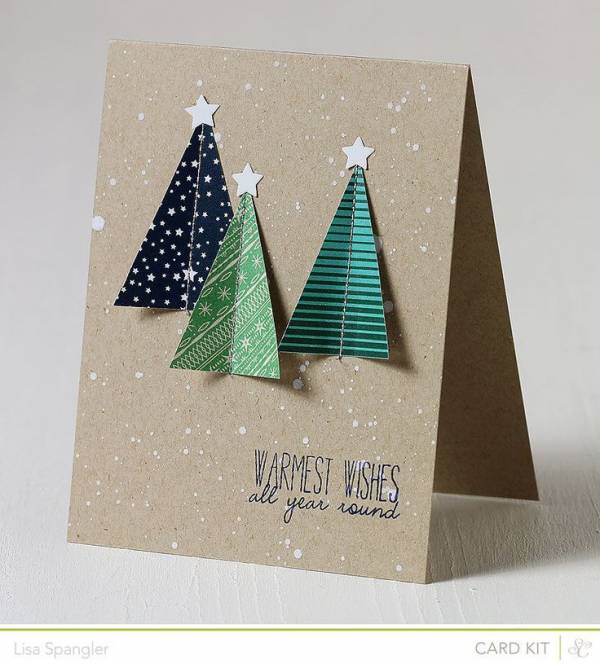
 

Stitched Trees

Warmest Wishes: Simple triangles become Christmas trees when stitched and topped with a star.
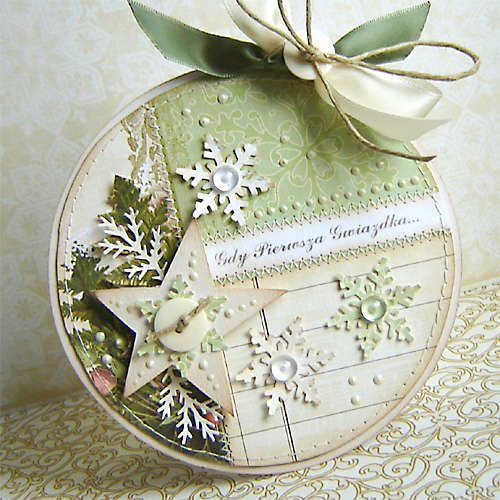
Circle CardCircle Card: Go a different way with this lovely card in a circle shape.

Visit our online Amazon store for a curated selection of must-have tools, embellishments, and supplies. Whether you’re a beginner or a seasoned pro, you’ll find everything you need to create stunning scrapbook pages that capture your favorite memories. Don’t miss out—check out our store now and start crafting with the best! Visit us at CraftGossip Amazon Store.
«
»

Comments

  1. Cynthia Holley says

    January 31, 2021 at 7:18 pm

    How did you make the circle card?

  2. Heather Holbrook says

    February 1, 2021 at 11:38 am

    Sorry Cynthia, this post is from 6 years ago and it looks like the link to the original project post is no longer valid.

Have you read?

How to Organize Scrapbook Supplies in a Small Space (Without Losing Your Creativity)

I need to confess something.

For years, I believed that if I just had a bigger craft room, I’d be more organized.

You know the fantasy — custom shelving, labeled jars, everything perfectly sorted by colour, a big table in the middle, soft music playing, no one asking what’s for dinner.

Instead?

I had half a dining table.
A cupboard that needed to close.
Teenagers walking through.
And Aloo deciding that foam dots were probably edible.

If you’re trying to figure out how to organize scrapbook supplies in a small space, I see you.

Maybe your “craft room” is:

  • A corner of the bedroom
    • A rolling cart you hide after dinner
    • A closet shelf
    • A repurposed bookcase
    • A folding table you have to pack away

And every time you sit down to scrapbook, you spend 15 minutes looking for the good scissors.

Here’s the truth no one tells you:

Small space scrapbooking isn’t about buying prettier storage bins.

It’s about creating a system that makes it easy to start.

Because when your supplies are chaotic, you hesitate.
When they’re simple and visible, you create.

So let’s make your space feel calm, functional, and inspiring — even if it’s tiny.

Step 1: Declutter Before You Organize

I know.
This part is uncomfortable.

But organizing scrapbook supplies in a small room without decluttering first is like trying to tidy a junk drawer by rearranging the junk.

Pull everything out.

Ask yourself:

  • Do I love this paper?
    • Have I used this in the last year?
    • Am I keeping it out of guilt?

Small space = intentional stash.

You don’t need 47 sheets of patterned paper you don’t even like.

Keep what inspires you.
Let go of what doesn’t.

Step 2: Organize Scrapbook Supplies by Category

This is where everything changes.

Stop storing by collection.
Start storing by type.

Group your supplies into clear categories:

  • Patterned paper
    • Cardstock
    • Photos
    • Adhesives
    • Tools
    • Stamps and ink
    • Embellishments
    • Scrap paper

When everything has a category, your brain relaxes.

You’re not rummaging.
You’re reaching.

Step 3: Store Scrapbook Paper Vertically

Paper is usually the biggest space hog.

Stacked flat, it takes over.
Stored upright, it behaves.

Use:

  • Magazine holders
    • Vertical paper trays
    • Slim rolling carts
    • Upright cube shelves

You can sort by:

  • Color
    • Theme
    • Season
    • Collection

Just choose one method and stick to it.

If you can see it, you’ll use it.
If it’s buried, it becomes forgotten clutter.

Step 4: Use Vertical Storage (Think Up, Not Out)

When organizing scrapbook supplies in a small space, vertical storage is everything.

Use:

  • Wall shelves
    • Pegboards for tools
    • Over-the-door racks
    • Stackable drawer units

You want your desk space clear so you can actually create.

The goal isn’t to store more.
It’s to store smarter.

Step 5: Contain Embellishments Before They Multiply

Embellishments have a way of breeding when you’re not looking.

Store them in:

  • Clear divided containers
    • Small drawer units
    • Photo storage boxes
    • Binder sleeves

And here’s the key:

Group by TYPE, not by brand.

All florals together.
All word stickers together.
All enamel dots together.

This makes designing layouts faster and less overwhelming.

Step 6: Create a “Current Project” Container

If you craft at the dining table or share your space, this will change your life.

Keep one small basket for:

  • Your current photos
    • Matching papers
    • Coordinating embellishments

When you’re done, everything goes back into that basket.

No re-deciding next time.
No starting from scratch.

Step 7: Keep Everyday Tools Within Reach

Never hide:

  • Scissors
    • Adhesive
    • Paper trimmer
    • Journaling pen

If you have to dig for them, you’ll lose momentum.

Use a small desktop caddy or rotating organizer.

Scrapbooking should feel easy to begin.

Step 8: Control the Scrap Paper Situation

Scrap paper can quickly become overwhelming.

Keep one dedicated scrap container.

When it’s full, purge it.

If scraps are spilling everywhere, they’re no longer helpful — they’re stressful.

Step 9: Consider a Rolling Cart for Flexibility

If your space doubles as something else, a slim rolling cart is brilliant.

You can:

  • Roll it out when crafting
    • Roll it away when finished
    • Keep supplies organized by tier

It’s perfect for small homes and shared spaces.

The Real Secret to Organizing Scrapbook Supplies in a Small Space

It isn’t buying matching bins.

It’s reducing friction.

When your supplies are visible, sorted, and easy to access:

  • You create more
    • You waste less time
    • You feel calmer

And that calm? It matters.

Because scrapbooking isn’t about perfection.

It’s about preserving memories without battling your own clutter.

Quick Recap: Small Space Scrapbook Organization

  1. Declutter first

  2. Categorize clearly

  3. Store paper upright

  4. Use vertical storage

  5. Group embellishments by type

  6. Keep tools accessible

  7. Maintain a scrap bin

  8. Use a current project container

You don’t need a craft room makeover.

You need a system that fits your real life.

Now tell me honestly — are you a neat-and-tidy scrapbooker… or a “creative chaos but I know where everything is” type?

Because I’ve lived in both worlds. Sometimes in the same week.

Explore

backgrounds Christmas Crafts Design Theory die cutting embellishments family Freebies Free Printables Holidays Inspiration - Layout Ideas Journaling News Paper Crafts Scrapbooking Themes Scrapbook Titles Techniques Tips and Tricks Tutorials Tutorials & Ideas

RSS More Articles

  • Designer Spotlight: Colorfully Sarah Shop
  • How to Organize Scrapbook Supplies in a Small Space (Without Losing Your Creativity)
  • Dollar Tree Free Shipping Code: Shop Online and Save
  • How to Make an Upcycled Shaker Card
  • Free Felted Woodland Mini Mending Pattern Review
  • Free Felting Tutorial Friday: Needle Felted Dragonfly
  • Knit a Hood for Your Fall Wanderings
  • Book Review: Borders
  • How to Make a Cute Teddy Bear Mini Journal
  • How to Make a DIY Detox Hair and Scalp Mask for Product Buildup

Copyright © 2026 · CraftGossip | Start Here | Contact Us | Link to Us | Your Editors | Privacy and affiliate policy