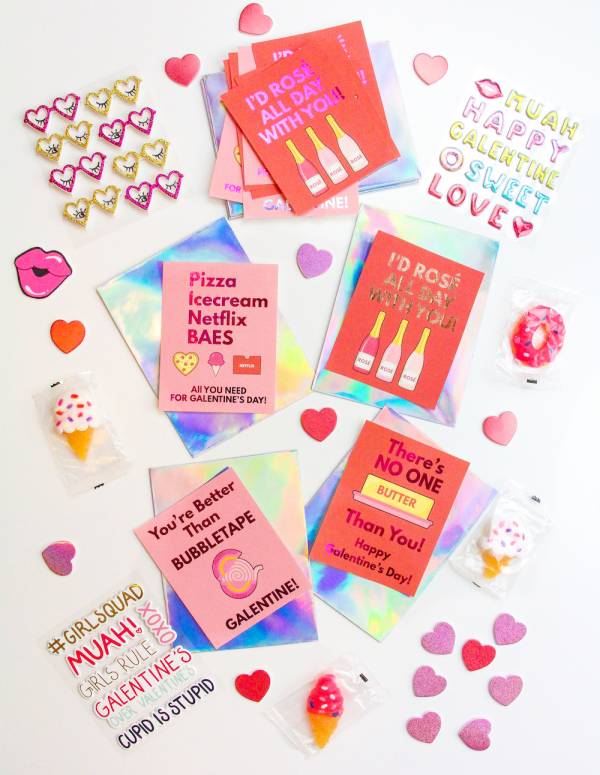
Foil all the things this Galentine’s Day! If you’re looking to add a little extra sparkle to your celebrations, these free Galentine’s Day cards are the perfect starting point. Whether you’re sending love to your besties or documenting the day in your scrapbook or Project Life album, these cards will shine—especially when you add some DIY foiling magic!
Now, while these cards are absolutely adorable on their own, adding foil will take them to the next level. Foiling can make your cards truly pop with a bit of glitter and glam, but it does require a few special supplies. Don’t worry, though; once you get the hang of it, the process is simple and fun!
Foiling Tips:
- Choose the Right Paper: For best results, make sure you’re printing your cards on a paper that works well with foiling. A smooth cardstock or a slightly heavier paper will hold the foil better and give you a crisp, clean finish.
- Get the Right Foil: You’ll need special foil sheets for this project. Look for adhesive foil or foil sheets designed for DIY projects. There are various colors and finishes available, so you can match it to the vibe of your cards—whether you want subtle gold or a bold holographic shine.
- Foiling Methods: There are a couple of different ways you can apply the foil:
- Using a Laser Printer: Print your designs on a laser printer, as the toner will act as the adhesive for the foil. Simply apply the foil over the printed design and run it through a laminator (or use an iron for an easy DIY method).
- Foil Adhesive: If you’re using inkjet printed designs, you can apply a special adhesive in specific areas where you want the foil to stick, then lay the foil over it and use a laminator to heat the adhesive and bond the foil.
- No Laminator? No Problem!: If you don’t have a laminator, you can still use an iron (set to low heat) with parchment paper to transfer the foil. Just be sure to press evenly and avoid moving the iron around too much to get smooth, even results.
- Extra Touches: Once your foil is in place, consider adding a bit of glitter glue or other embellishments to bring even more sparkle to your cards. Layering different textures can give your cards a dynamic and luxurious look.
- Foil Placement: Don’t be afraid to get creative with your foiling placement. You can foil the entire card, just the lettering, or even specific design elements like hearts or borders. Play around with different techniques until you find what feels best!
Even without the foiling, these cards are adorable on their own, but if you’re feeling extra fancy, foiling will take your Galentine’s Day cards from sweet to spectacular. Whether you’re mailing them to your besties or saving them for your scrapbook, your gal pals will be amazed at the effort and sparkle you’ve put into this thoughtful DIY gift. So go ahead—foil it up and add that touch of glam!
Get them here: Free Printable Foiled Galentine’s Day Cards


Leave a Reply