• Home
  • Suggest A DIY
  • DIY Newsletter

Scrap Booking

Themes, layouts and inspirations

  • About CraftGossip
  • Our Network
    • Bath & Body Crafts
    • Candle Making Ideas
    • Crochet Ideas
    • Cross Stitch
    • Edible Crafts
    • Felting Patterns
    • Glass Art
    • Home & Garden Ideas
    • Indie Crafts
    • Jewelry Making
    • Kids Crafts
    • Knitting Patterns
    • Lesson Plans
    • Needlework
    • Party Ideas
    • Polymer Clay
    • Quilting Ideas
    • Recycled Crafts
    • Scrapbooking
    • Sewing Patterns
    • Card Making
    • DIY Weddings
    • Not Craft Ideas
  • Giveaways
  • Roundups
  • Store
  • Search

Thursday Tutorial | Cutting Straight Edges in Washi tape

April 11, 2013 by Francine Clouden

Do you like working with washi tape? I love it, and have totally jumped on that band wagon. Along the way I have come up with a few techniques for using it on projects, and today I want to share a very quick and simple one.

Take a look at this layout that I made for the Sister Sketch series on my personal blog.

Sister Sketch July 2012 Sandcastle Initiation

Do you notice how the washi tape is cut in a straight line along the top? Usually I love the torn effect of the tape – one of the things that makes washi tape so easy to use is that you can just tear bits off the roll. But on this page I really wanted a clean cut edge for my title. Now I’ll show you how I did that!

Washi Tape Tip - Callaloo Soup Blog copy

All you will need to complete this technique is a metal ruler and a craft knife.

Washi Tape Tutorial - Callaloo Soup Blog
Step 1. Apply the washi tape to your projects by tearing strips off the roll.

Step 2. Place a metal ruler along the side that you want to be straight. I like to line the top of the ruler up with the top edge of the background. This ensures that you get a pretty straight line.

Now hold the ruler down with one hand and lightly draw the craft knife through the tape, using the ruler edge as a guide. The tape is very thin, so you only need to use a light hand, and you will cut through the tape without cutting through the background support.

Washi Tape Tip - Callaloo Soup Blog-4 copy

If you look closely in the photo above you can see the line I cut through the tape. Now very carefully pull the extra pieces off.

Washi Tape Tip - Callaloo Soup Blog-5 copy
And there you have it!

Washi Tape Tip - Callaloo Soup Blog-6 copy
You can repeat to have a nice straight edge on the other side, but I like the torn bits too, so will keep mine as is, and use this background for a scrapbook page soon!

What do you think? Is this something you can use? Do you have any washi tape tips to share?
«
»

Have you read?

Cute Halloween Scrapbook Mini Album

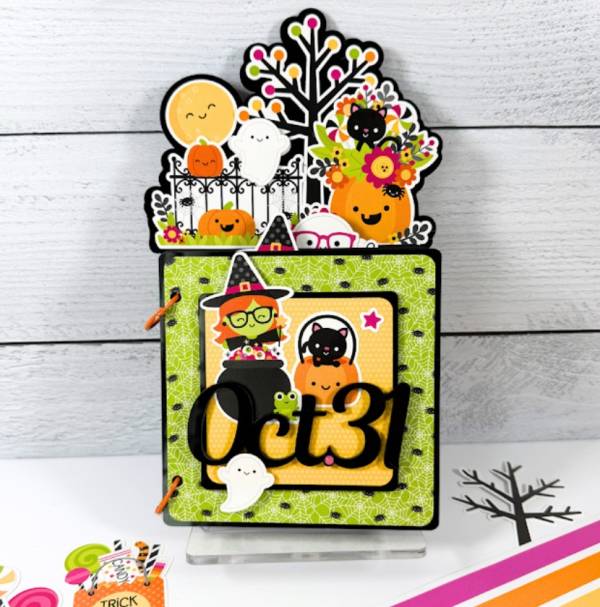
Traci used the “Hey Pumpkin” collection from Doodlebug to create a darling Mini Album for Halloween. The album measures 6″x6″ with rounded covers decorated with green spider web pattern paper and another layer of orange paper with a large black acrylic Oct. 31 and a cute witch and black cat printed embellishments. 

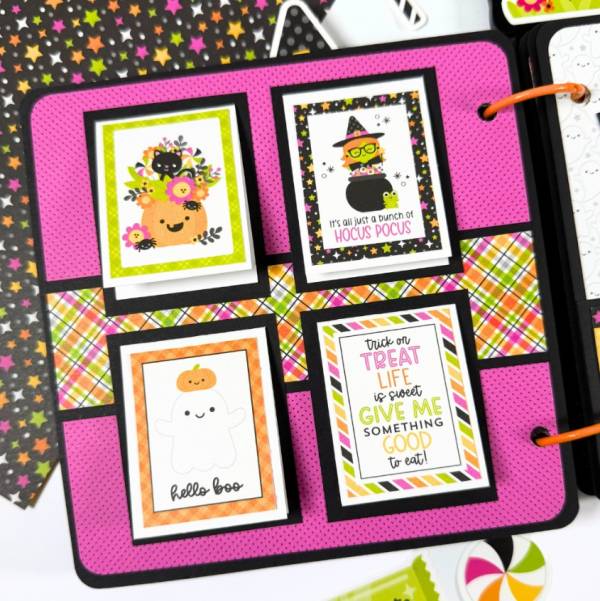
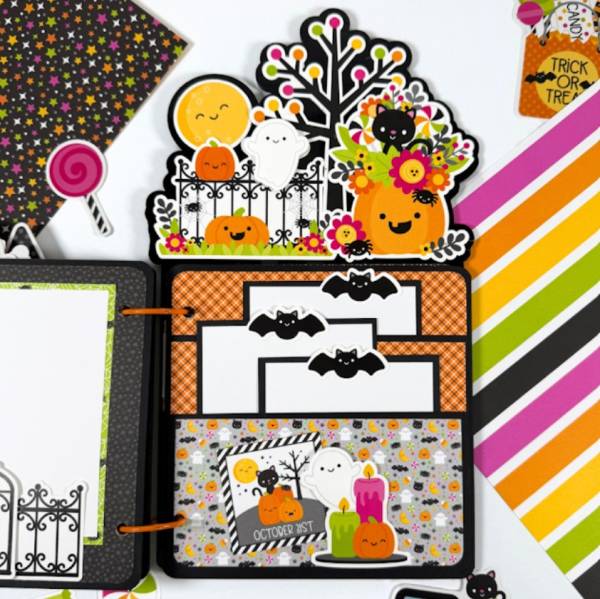
Inside the pages use the same cute collection for a cohesive design and she’s included fun interactive pages like this four lift up flaps and some pockets on other pages too.

But the big stand out of this album design is part of the back cover where she created an amazing extension of elements coming up over the top. This fun little scene has a spooky gate, creepy tree, cute pumpkins, colorful flowers, a peeking cat, happy ghost and big beautiful moon. I’ve never seen anyone do this on an album and I think it’s such a fabulous extra touch!

Visit the Artsy Albums blog for all the details.

-Heather

Looking for scrapbook supplies, we recommend A Cherry on Top.com

Explore

backgrounds Christmas Crafts Design Theory die cutting embellishments family Freebies Free Printables Holidays Inspiration - Layout Ideas Journaling News Paper Crafts Scrapbooking Themes Scrapbook Titles Techniques Tips and Tricks Tutorials Tutorials & Ideas

RSS feed: More Articles More Articles

  • Designer Spotlight: And Wabi Sabi
  • Stitch a Play Mat with a Gorgeous Butterfly
  • 20 Non-Candy Halloween Treat Ideas for Kids, Classrooms and Trick-or-Treaters
  • DIY Snowman Door Hanger Using Tulle and Fairy Lights
  • Whipped Manuka Honey Body Butter – Ultra-Rich DIY Moisturizer for Dry, Mature Skin
  • How to Wet Felt an Embellished Clutch Purse by Natasha Smart Textiles
  • 10 Cute Halloween Scrapbook Layout Ideas
  • Book Review: The Wandering Knitter
  • Book Review: Irresistibly Cute Mini Amigurumi – 62 Tiny Crochet Projects
  • 10 Easy Overnight Oats Recipes That Are Full of Flavour

Copyright © 2026 · CraftGossip | Start Here | Contact Us | Link to Us | Your Editors | Privacy and affiliate policy